The Mission Should You Accept: Part 1
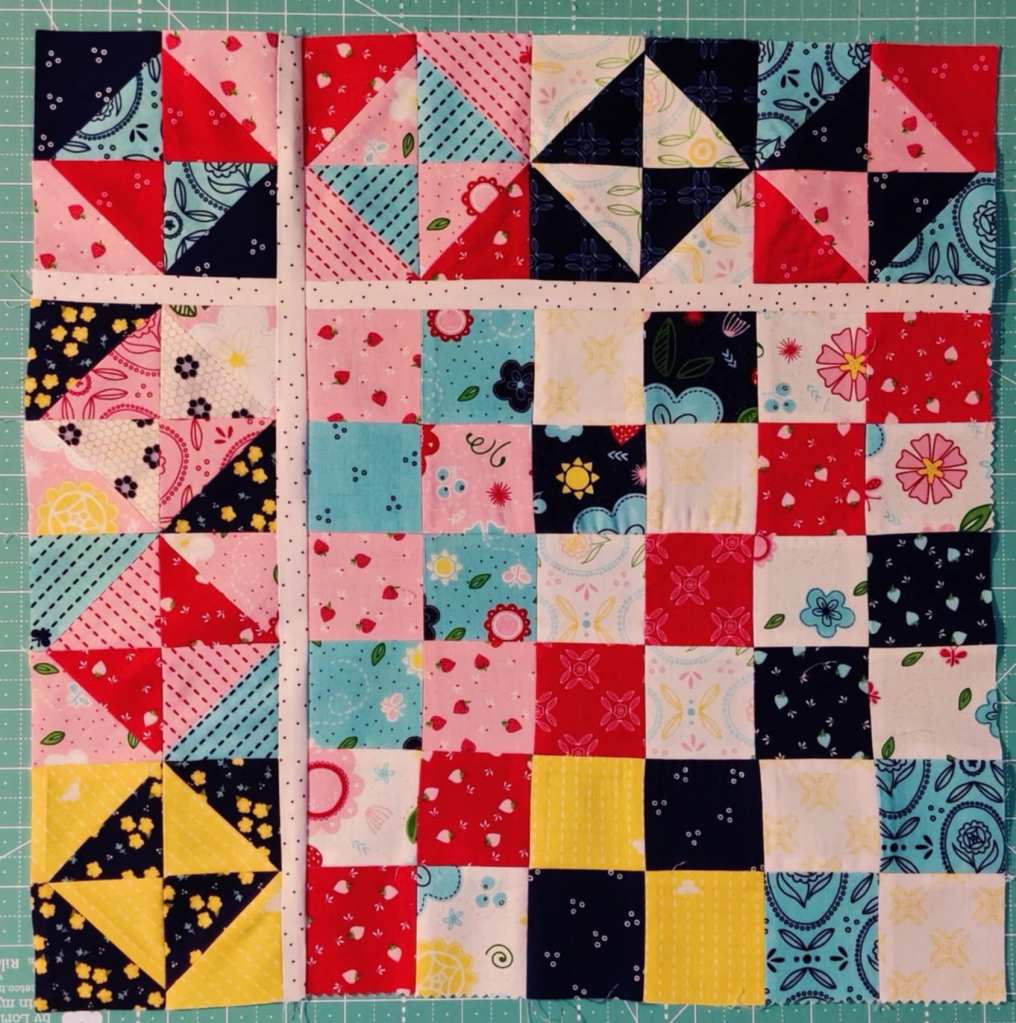
I know this may seem like an unusual title for a Scrappy Quilt sew along, but I envision us creating a vibrant, scrappy quilt together, giving each participant the freedom to choose how scrappy to make it, along with their color palette and quilt size. This initiative is all about creating, sewing, and enjoying the process as a united community. It’s an excellent opportunity to bond and support one another while crafting something beautiful! Together, let’s strengthen our community and sew with unity to uplift each other during these challenging times.
As many of you know, I’m already formulating plans for 2025, and this scrappy quilt project is a key part of that vision. Just the other day, I realized how wonderful it would be to create this quilt as a collective. Remember, a village can achieve anything when we come together. We will enjoy making this scrappy quilt while utilizing our existing stashes. And speaking of stashes, feel free to incorporate charm packs; if you don’t have any, layer cakes, fat quarters, or yardage are also great options. While I won’t discourage you from purchasing charm packs, I’ll also share a video showcasing my own stash, which I believe is quite substantial. I haven’t bought charm packs in over a year, and most of what I have isn’t readily available in the market anymore—most are at least five or six years old.
I encourage everyone to use supplies from our stashes as much as possible, though this isn’t a rigid rule. Personally, I’ve faced challenges purchasing fabric over the past year due to budget constraints while also supporting my son and grandson. Many of you understand what I’m talking about. They still require some assistance, but thankfully, things are improving steadily.
Since this will be a design-as-we-go sew-along, I am establishing clear guidelines below to effectively guide us in this group endeavor. Let’s start by discussing supplies. We will tackle the assignment in parts, and I will meticulously document our progress so that by the end, we will have a well-defined pattern ready to be written up and shared among us all!
Supplies:
1. Two to four charm packs
A. If you do not have charm packs, there are alternatives like layer cakes, fat eighths, fat quarters and yardage.
B. Thread of your choice.
2. You’ll need the usual tools: rotary cutter, snips, rulers, sewing machine & iron.
A. On a side note. You don’t need to starch. Save your money! LOL 🙂 🙂 Pull from what you have on hand.
Outline:
1. During the creation of the quilt, we as a group will need to name the quilt at some point.
2. The creation of the quilt will be done in steps so that those who accept the mission can take time to enjoy the process and not feel pushed to hurry up and get it done.
Some of what we sew will be time-consuming, but it will be simple enough even for a beginner.
3. Assignment 1:
A. We will start out with two charm packs. (Most have 42 – 5″ squares in them.
If any of your charm packs has less, we can compensate for that at some point or you can add additional pieces from another charm pack you might have on hand or cut from a fat quarter, fat eighth, layer cake or yardage.
If you do not have charm packs but have what was mentioned above, you will need around 84 – 5″ squares.
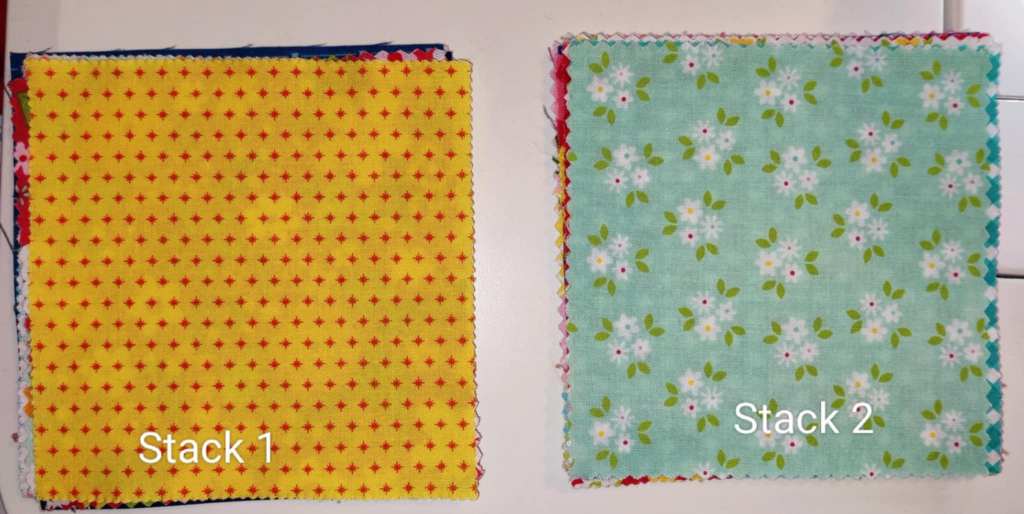
B. Most charm pack colorways have 2 each of the same colorway.
1. Separate them into two stacks. Each stack will total 21.
2. Next you will take stack one and make groupings of two’s.
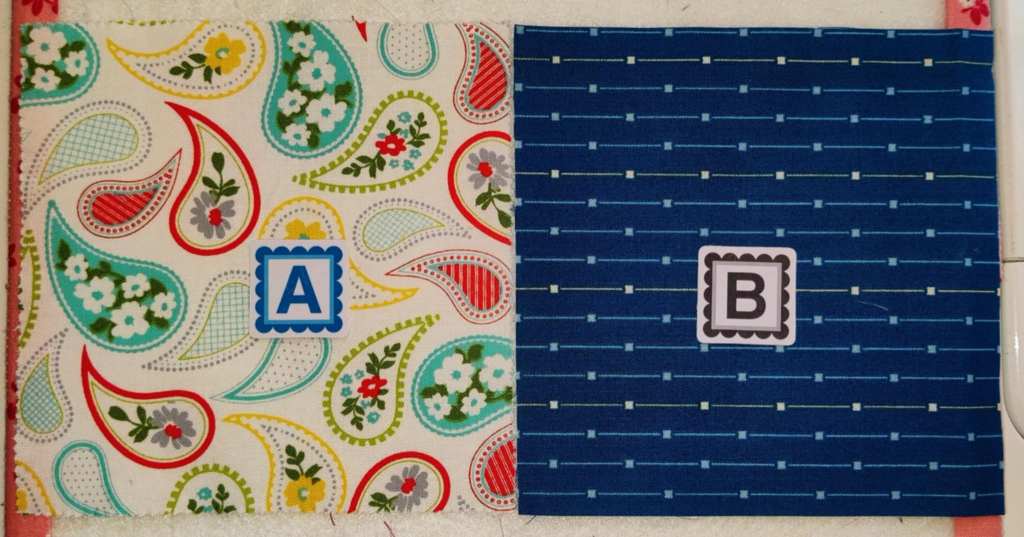
3. With each set of two, you will turn them right side together. Make sure they are
aligned properly all around the edges.
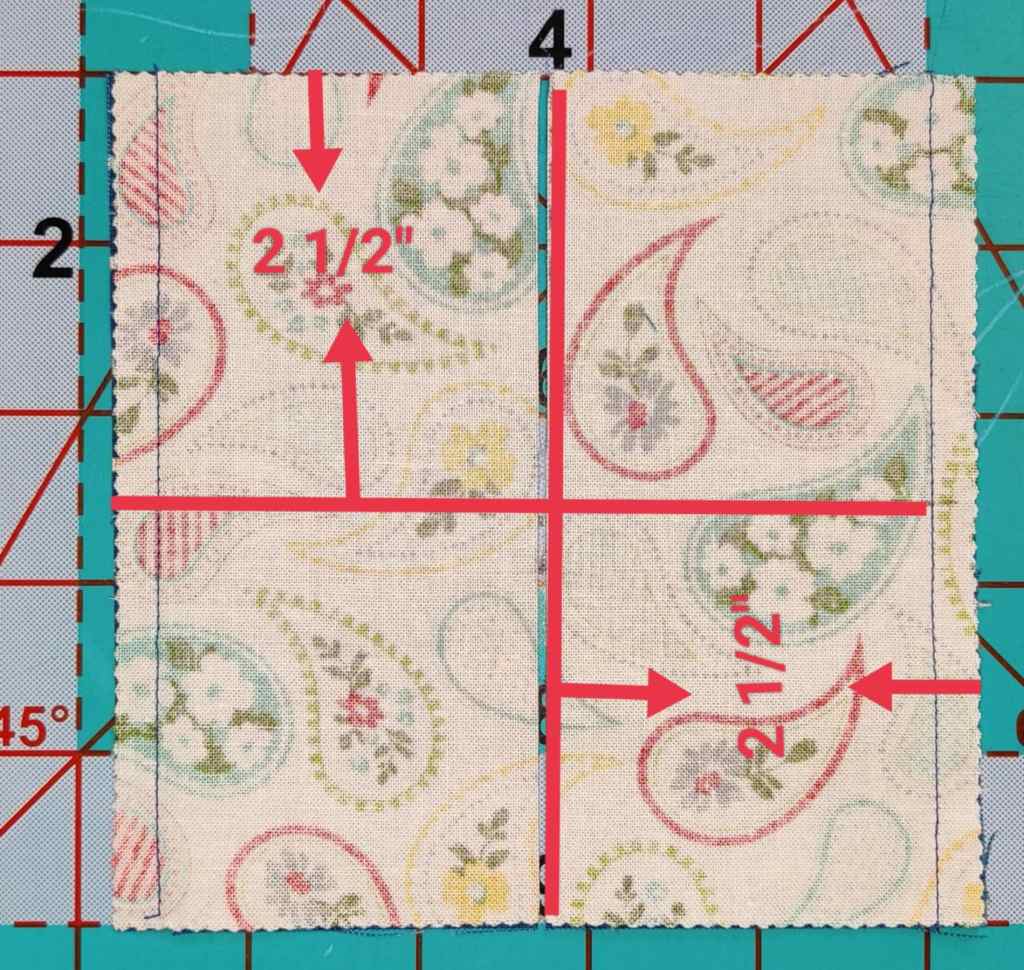
4. With your sewing machine, sew a 1/4″ seam allowance on the left and right side of the paired charm squares. The seam allowances should be parallel to each other.
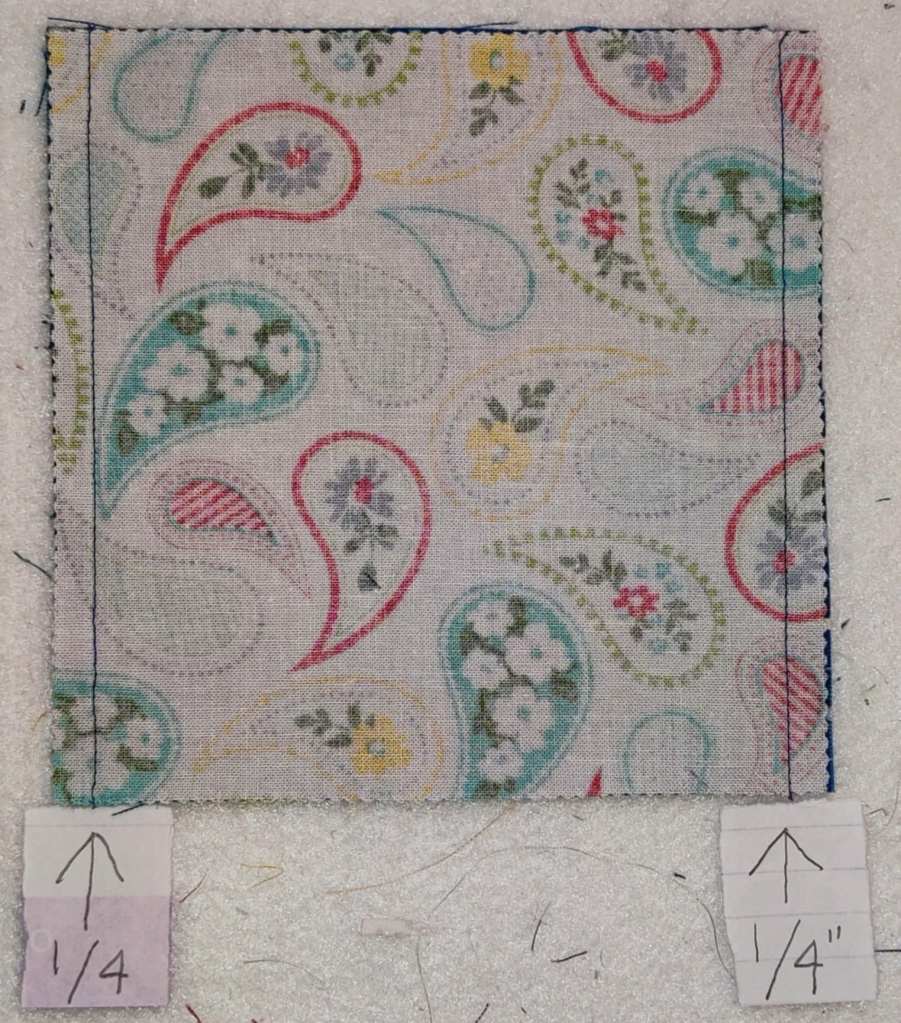
5. Now with a ruler, measure 2 1/2″ from the left edge and cut block in half vertically while being careful to not to move the block.

Measure from other edge 2 1/2″ and cut block in half a second time horizontally. You will have 4 – 2 1/2″ x 4 1/2″ blocks.
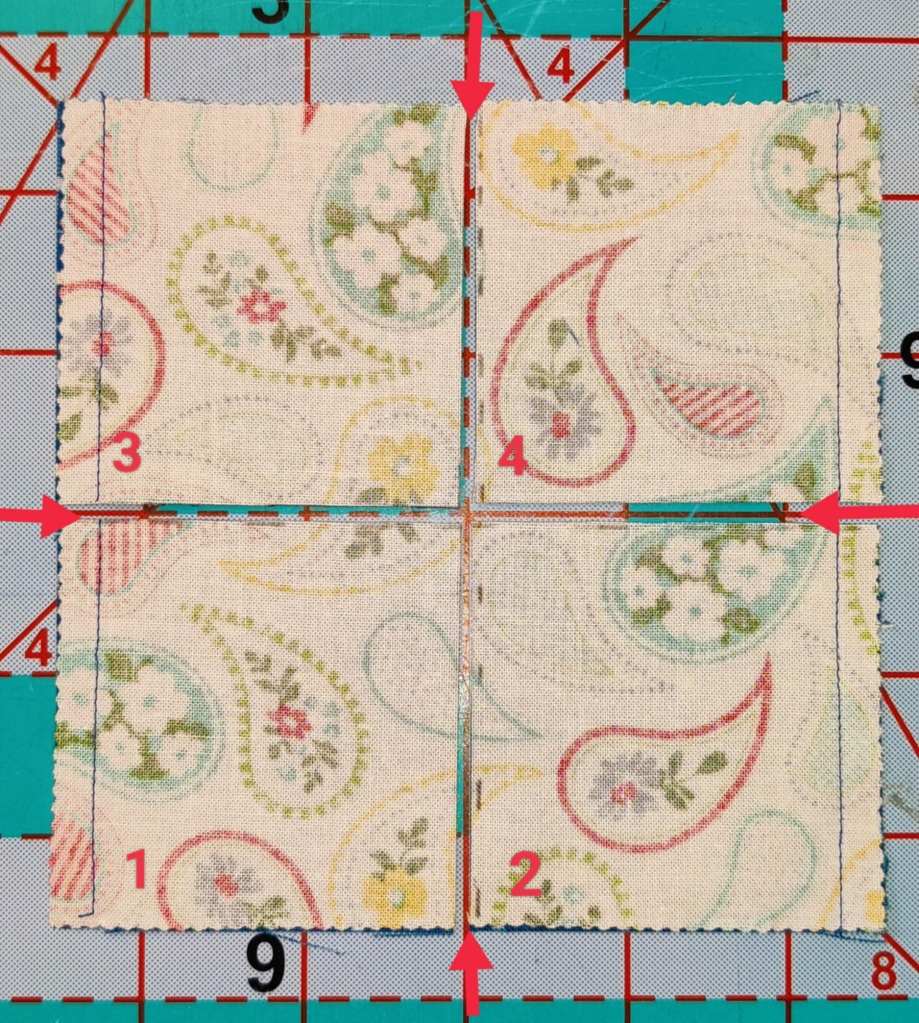
The image above shows that there are now four half patches. This was created from one unit sewn together as previously shown.
6. Now we will sew two together to create a four patch by rotating one in the opposite direction to create that four patch effect. Note: For each pair sewn together, when they are cut twice, there will be four 2 – 1/2 patch segments. I”m not sure how else to word that.
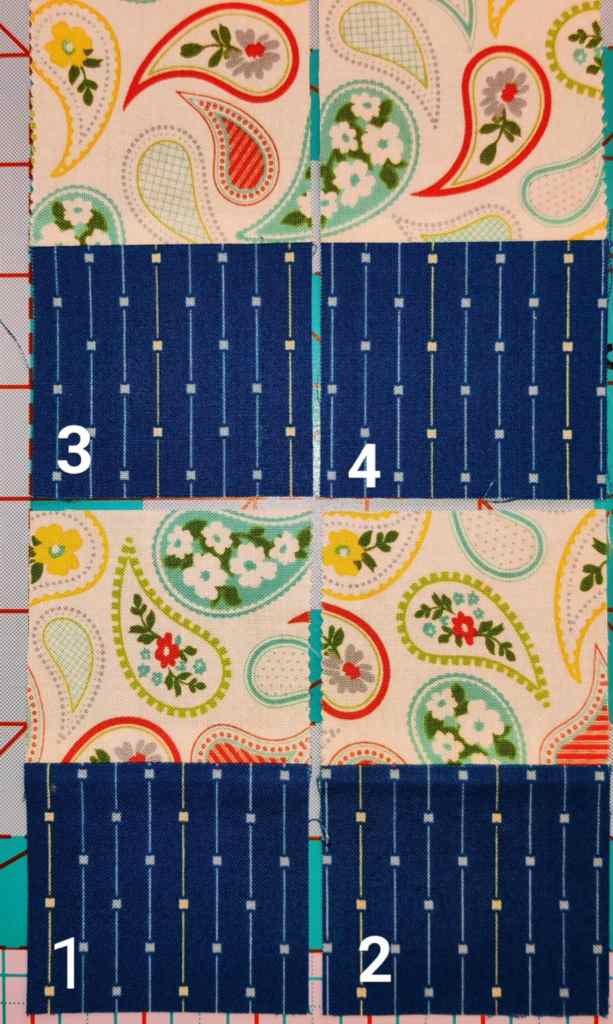
7. You have the ability to take each 1/2 patch and mix and match how you wish them to be. Get creative! Be Scrappy! This part of the assignment is for you to make all your four patches first. Remember, you must only use half of each charm pack. You’re going to need the other half for the Hour glass blocks! 🙂
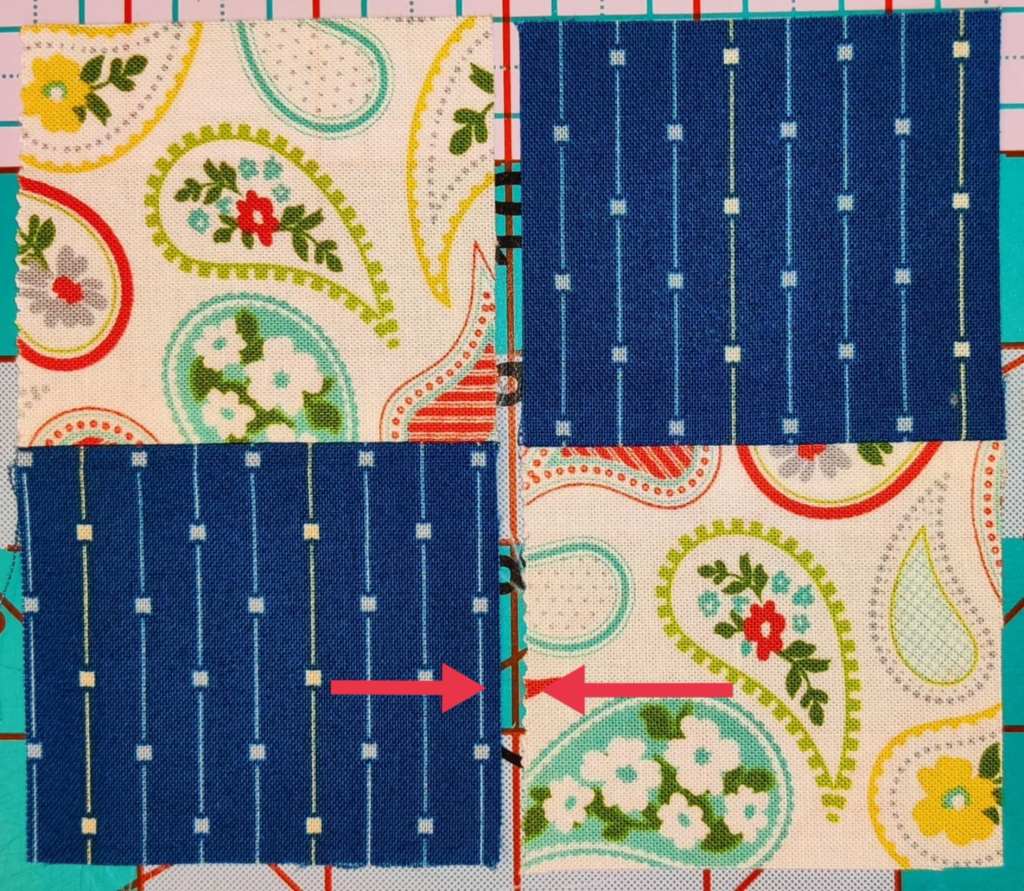
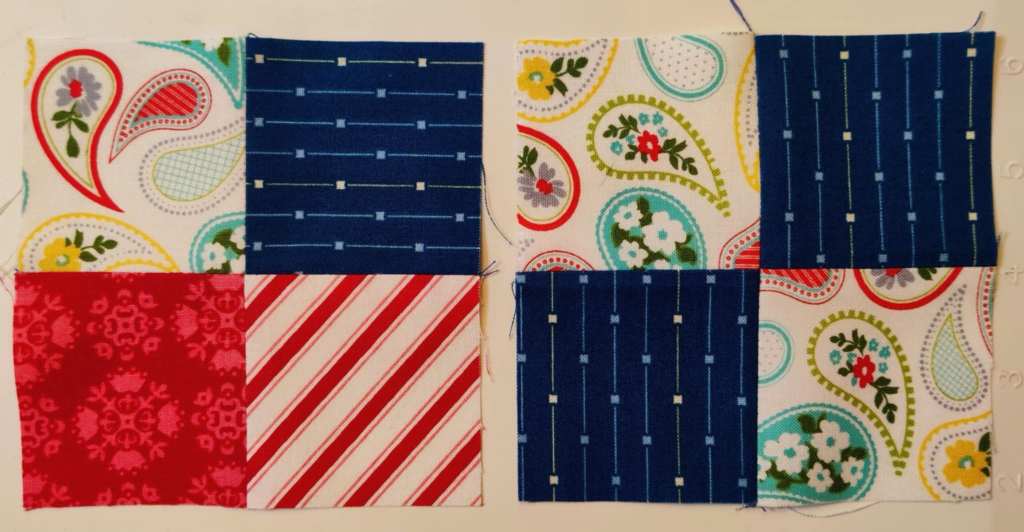
In the image above you will sew two half patches together to form a four patch unit. The image below shows two four patch units. One that I kept the colors together and the other having mixed them some. You can decide on which way you wish to do the four patch blocks.
I’m confident that what I’ve written is clear. I’ve already outlined how to get started in Friday’s live session on January 24th, 2025, and I’ll reinforce those instructions in Saturday’s live as well (January 25th, 2025). Be sure to check both of those videos along with this blog. If you need further assistance, feel free to reach out to me on the Greenland Quilters Facebook page or visit my YouTube channel’s main page to find my email, and don’t hesitate to send me a message. You will have plenty of time to get all the four patches made since we won’t actually start sewing them together until the third week in February. I post that date in the community tab in a few days as well. 😉
Happy sewing y’all!!! Let’s see what you come up with!
Links:
Thomas & Blaze’s GoFundMe Page
Go here to donate funds.
Amazon Wish List for Thomas & Blaze
Thomas and Blaze’s wish list
Greenland Quilter
Living Greenland Facebook
Living Greenland Blog
